Category Archives: Visits to the Hive

Discusses the goings-ons at the hive.

Smarter Than The Average Bear

Just as the good weather started to bring about visions of busy honey bees last week, so too did it bring out something much larger and furry! As you can see by the photos in the album below, the bear did a doozy on the hive:

When I originally buttoned up the hive for winter, I figured that there was a good possibility of a bear paying a visit this spring.  However, my novice thinking was that the bear would move on to something easier after not being able to push the hive from between the straps and the stone pad.  Apparently, this bear was smarter than the average bear!

As you can see from the photo album, the bear appears to have lifted the stone pad (which weighs about as much as I do) onto its side, upsetting the hive and allowing the bear to get into the tasty treats inside.  Luckily, its damage was limited only to the polystyrene outer cover and the majority of the frames found in the upper hive body.  By the way, this same bear also decided to cherry pick the kitchen garbage bag from the other junk in the garbage toter when it wasn’t able to upset the toter (I learned long ago to keep it secured upright to keep a clean lawn!).  Definitely Yogi Bear territory here.  🙂

Another casualty was the brood and queen.  A common misconception about bears is that they disturb bees to get to their honey.  However, seeing frames of honey left behind while frames of brood were destroyed in the pictures above underscores the real target of the bear – the developing bees.  Compounding this, since there is little to no brood remaining, my only real option to ensure the hive continues to grow and prosper is to introduce a new queen bee.

Due to the timing of the attack, obtaining a new queen turned out to be a bit of a challenge.  Why, one may ask?  This time of year, aside from winter, is typically the most difficult time to find queens available for sale since they are often not yet available or already promised to someone who ordered them in December or January!  Fortunately, I was able to find Stiles Apiaries via a lead from my local beekeeper’s club’s Facebook page.  Although he didn’t really have any to spare, Grant was kind enough to free a queen up to help me out of this predicament.  His help is greatly appreciated!

So the question now becomes ‘What are you doing to keep the bear from coming back?’  To help deter future pleasant visits to the hive, I have begun installing a small electric fence system around the hive which runs off of solar power.  Once I have the ground rod and proper feed wires in place, the bear’s next visit will be more of a ‘shocking’ experience than the last.  Until then, I have been regularly surrounding the area with a very, um, odorous repellent spray for gardens.

All of this and I haven’t even gotten a chance to speak about the mites!  What a start to the season it has been.  Be sure to check in regularly as the pace begins to pick up.  Before you know it, I might actually get to extract some honey this year!

All Ready for the Cold Weather

As I noted in my last post, the cold weather is a-coming in my neck of the woods so I took some time last weekend to close up the hive.  The measures you’ll see in the photos below are important for protecting the bees from both the elements and predators.

Regarding the weather, you might think (like I did) that the biggest danger to the bees is the low temperatures.  For those of you who have read my blog from the start, you’ll know that this isn’t necessarily the case since the bees create the ‘winter cluster’.  This winter cluster allows the body heat of the thousands of busy bees to warm the cluster to 92 degrees!  So what is the real threat from the elements?  In a word, condensation.  In a hive lacking the proper ventilation through the winter, the water will collect in the top portions of the hive and drip onto the bees.  To put it in perspective, imagine taking a shower and then running out into a snowstorm!  🙂

Regarding predators, this post fill focus on the ‘big’ ones – mice, skunks, and bears.  Since hives are warm due to the little furnace inside, mice love to move in around this time of year and camp out through the winter months…destroying the hive as they go.  As food gets scarce, skunks and bears will also turn to hives for snacks.  A skunk will actually sit outside of the hive entrance and make a commotion, causing the hive to send out some guard bees to investigate – perhaps snack bees is a better term.  😦  Bear also apparently love the taste of honeybee brood (not necessarily the honey) and will topple and ransack hives to get to them.

In addition to all the winter preparations, the dropping temperatures also means that it was time to take the feeder off.  Hopefully the girls will have enough to last them through to the spring!  🙂  Some of the pictures below will deal more with the procession of bees back into the hive after I unloaded the feeder – I thought they were neat photos and I welcome your comments about them too!  🙂

Here is a general overview of the hive.  As you can see, I have it secured to the cement slab below using ratchet straps.  This will *hopefully* dissuade any bear from disassembling the hive.  Check back to see how that turns out.  :-)The hive has also been wrapped in tar paper at the suggestion of Beekeeping for Dummies.  This supposedly acts as a wind break and helps absorb more of the sun’s heat.If you look closely, the you’ll see that the white outer cover is sitting at an angle (i.e. higher in the front).  To cut the amount of condensation collection in the hive and to direct any that does collect away from the bees, the inner cover has been propped up about 1/2″ in each of the front corners. Winter Preparations
The white device at the entrance of the hive serves two functions: entrance reducer (less space for the bees to guard) and mouse guard.  As you can see from the top feeder refugees, the holes are the perfect size for a honey bee to fit through.  As for Mrs. Mouse, she’ll have to find an easier target for her winter home! Mouse Guard
See?  There’s plenty of room for the girls to squeeze through.  🙂 Mouse Guard Close-Up

Some additional things I have planned to do before the winter really gets cold is to put up a wind break around the hive (since my natural wind breaks haven’t grown in yet) and to place some dense foam between the inner and outer covers.  The later is a trick I picked up at the latest NE NJBA meeting and looks like it has some merit in preventing condensation.

An August Visit

Sorry for my hiatus last week!  I didn’t forget to post something, just merely run out of time with all the canning we have done.  We were blessed with tons of cucumbers so we should have pickles to last a few years!  🙂

This visit was just a bi-weekly check on the ladies to see how they have been doing.  I was a bit disturbed by the poor brood pattern the queen was laying and the small amount of brood.  Not only that, but she was missing in action and I was still not able to spot any eggs – spotting either of them is one of the priorities of each check of the hive.  I checked back a few days after the photos below were taken and I was able to locate her in one of the outermost frames.  Whew! I thought she went MIA like the last one did.

I’ll be attending my first Northeast NJ Beekeeper’s Association meeting this Friday, so with any luck I’ll be able to figure out if I should requeen before the winter or not. I’m excited to meet people who know a thing or two (or a lot!)  about bees, but it should be interesting showing up as the stranger.  Oh well, I’m sure it’ll be fun!

Be sure to check out the pictures below – as like times before I try to keep showing different things about the hive and usually point out the purpose of the photo in the caption.  For the two videos in the list, be sure to click on the ‘open’ button on the right-hand side to view two short movies I also took.  I thought they were pretty neat and hope you do too!

Bee sure to leave any comments and questions you might have – if I can’t answer it I’m sure I can find someone who can!  🙂  Until next week!

Summer Check

As promised in last week’s post, this week’s post pertains to my visit to the colony a little over a week ago.  As you can see in the photos below, I focused how different aspects of the comb and all the interesting things that the bees place into it.  Since each photo really tells a different story, please click on each photo and read the captions that go them to get a better understanding of what you are seeing.

One photo I would like to specifically focus on, however, is the photo illustrating the transition between the beeswax foundation and the drawn-out comb.  The first time beekeeper will often get inquiries about if they will be expecting honey their first year.  However, like me they will find that they will be beginning with new equipment, which only has the foundation seen on the right of the page.  An experienced beekeeper in contrast will likely have frames of comb that have already been drawn out – saving the bees from the work of having to build up the comb before they worry about what to put in it.  A true beginner will find that a lot of the reason for the slow progression the first year (aside from the small size of the colony) is that there is so much work drawing out and filling 20 frames worth of foundation (actually, a few less to prevent overcrowding) before the bees can being work doing the same in the honey supers, where the harvested honey is stored.

On a different subject, since we are officially in August now its time for me to begin considering a few new challenges for the winter months:

  1. pest management (i.e. hungry bears)
  2. when to begin the fall feeding
  3. how to protect the bees over the winter months

Check back for some future posts addressing these issues.  Until then, enjoy what is left of your summer!  🙂

A Sticky Situation!

As the season progresses I have tried to show some different perspectives to beekeeping.  However, I can image seeing the same pictures of my inspections can start to blend together.  I’m also trying to keep a lot of the ‘educational’ stuff for over the ‘off months’ when we’re all busy setting by crackling fires and the bees are huddled up into their nice toasty ball.  So the question for my inspection last week (for the blog at least) was what new perspective could I give to the bees and the beekeeping process?

Where's the guard bees?Asking my lovely executive-beekeeping-support-assistant (i.e. my wife) for some ideas, she suggested that I focus on the guard bees.  Guards bees?  Yep, even a beehive requires a little security.  Specifically, the guard bees hang out at the entrance to the hive and at the opening of the inner cover and are basically the security guards at a concert, making sure who has a ticket is allowed in and all the trouble-makers stay out.  Who would want to cause trouble for honeybees you ask?  The list includes other insects trying to get into the honeybee’s sweet stash, rodents and other small animals, bear, and other honeybees!  You read that right – even honeybees from one hives are known to ‘rob’ from another (typically weaker) hive.  The guard bees are able to tell who belongs and who doesn’t based upon the particular scent of each bee – if it matches the hive, access if granted.  However, just like a concert some outside bees are able to ‘jump the gate’ while the guard bees are preoccupied.  In more serious instances, the guard bees can be overwhelmed by a bunch of attackers and a war ensues at the front of the hive.

As you can see, guard bees would have certainly have been a neat sight to see.  However, as you can see in the photo above, the guard bees were either on coffee break eating honey donuts or, more likely, higher up in the hive since they still have plenty of room.  So, my predicament continued…

PropolisLuckily, the predicament didn’t last long.  As I began to open frames in the lower brood chamber I found that my new queen apparently loves everything glued together!  Among the different products that bees either collect or produce, propolis is used as the adhesive in hive construction – and is often a pain to  the beekeeper!  Unlike before, where I was able to separate frames by hand, each frame had to be separated using the hive tool.  In reality, it’s really just a bother more than anything else.  As you can see in the photo at left, the ladies were busy making sure the frames stay in place, gluing them to each other and the hive body.  I suspect a future post will discuss all the benefits of propolis and what not, but for now lets just use it as an illustration of how the behavior of the hive can change with a new queen at the helm!

Bee toungesI have also included a few other neat things I seen and were able to get photos of.  For example, at left you can see a bunch of bees huddles around a portion of hive that was disturbed when I removed a frame (remember our talks about burr comb?).  If you look closely, you can see some little bee tounges busily (and happily it seemed) cleaning up my mess.  🙂


Queen CellAnother thing I was able to catch was one of the open queen cells that I had neglected to remove during my previous inspection (actually, I had left them all…which doesn’t help in figuring out which ones are new!).  During that time, I found about 3-4 open queen cells during the requeening process.  In the photo on the right you can see this cell as  viewed looking down from the top of the frame.

Beepkeeping Equipment – For the Apiarist

Since I was busy last weekend watching my baby sister get married, I didn’t have a chance to drop by and check the ladies out.  This isn’t too big of a deal since they should be getting to the point where they will need a little less attention than during the first 8 weeks.   Since this is the case, I figured I would continue from last weeks post about some of the equipment that is involved in beekeeping.  As I had mentioned, someone contemplating the beekeeping hobby must certainly consider the equipment that will be needed.  For everyone else, hopefully this will help you understand the purpose of a lot of the tools you have seen in the photos!

Apiarist Equipment

The beekeeper has a number of tools to help him in his trade, from the protective garments they wear to the hand tools, medicines, and other ‘toys’ that have a part in the care of bees.  However, undeniably the beekeepers most important tool is themselves.  Aside from the obvious task such as lifting frames with their hands, the beekeeper must also use all of their senses during inspections to help in gauging the health of the hive.  Perhaps even more important is the tool underneath the net hood!  The learned beekeeper is their best tool since an understanding of how the hive functions and possible pitfalls go far in being proactive in addressing small problems before they become big problems.

The Garb

Contrary to what Gentleman Jack may show on his Tennessee Honey advertisements, most keepers wear white or light-colored clothing (dark colors seem to make the bees more aggressive – apparently they think you are a bear! 🙂 ).  For a backyard beekeeper such as myself, usually a pair of khakis and a white long-sleeve shirt seem to do the trick.  Special heavy gloves are an option, and one which may be more helpful during the honey harvest.  For now, I use latex gloves – they let me seal the ends of my sleeves, give a little sting protection, and help keep my hands from getting all sticky!  Wearing a belt, tucking your shirt in, and blousing your pant legs into boots also help to keep the bees from going where you don’t want them (remember, they like small dark spaces – not stinging you!).  My least favorite part of the outfit is the veil, as you can see by my photo at right.  While extremely helpful in keeping the ladies away from my head and neck, the model I have is a bit uncomfortable and a pain to put on.  For an introductory piece of equipment it certainly does the trick but it will definitely be something to upgrade for future seasons.

Hive Tool

The hive tool is somewhat like the original multi-tool for beekeepers.  Shaped like a small crowbar, I found myself using it in the assembly of frames (trimming excess wood) and it is an essential tool during inspections.

The shape of the tool allows you to separate frames from one another in the body, as well as positioning a group of frames within the hive body.  It is also the tool of choice in ‘correcting’ burr comb and scraping propolis.

As you can see in the left hand side of the image at right, it is also helpful in maintaining your woodenware with a eye to pull nails, in addition to the two sharpened ends.

Smoker

For some, the smoker is perhaps the hardest piece of equipment to master.  However, with a little practice and an understanding of how to start a fire (i.e. tinder, kindling, then fuel) you will find yourself smoking away in no time!

The smoker works by using the bellows to gently force air through the combustion chamber where the fire is essentially smoldering.  The smoke that is blow out is helpful in warning the bees of your impending visit as well as keeping them at bay while you are checking things out.

The reason smoke is so effective is because it has a calming effect on the bees.  They begin to behave in a way similar to bees nearby a wildfire – they begin gorging honey in preparation for an emergency relocation.  The benefit to the keeper is that the bees generally get out of the keepers way as the frames are worked because they are busy between the frames eating honey!

Other Equipment

Some other equipment that is helpful for normal inspections to the hive includes the following:

  • Toolbox or toolbag – To hold all the beekeeper’s equipment
  • Two spray bottles – One is filled with rubbing alcohol for equipment cleaning after inspection and one is used for sugar spray during requeening and package bee installation
  • Baby powder – It helps with handling frames in latex gloves, plus the bees apparently like it
  • Container – Coffee can or similar container to store burr comb for later use

Beekeeping Equipment – A Primer

While the past weekend afforded me another chance to check the progress of the new queen, I thought I would shift gears for this post and talk about some of the equipment that is involved in beekeeping.  For someone contemplating the beekeeping hobby, equipment is certainly something that will need some preparation and forethought.  As for those of you just interested in how the hobby works, it will help you understand some of the nomenclature as well as offer some insight into why things are done the way they are.

Before jumping in to some of the stuff a beekeeper uses, I have to say that it was a relief getting to actually see the queen as I was looking through the hive – for a while there I though my eyesight wasn’t serving me well.  I was also surprised to see that the bees were more active in building burr comb (comb that isn’t supposed to be there – kinda like weeds :-D) and ‘gluing’ everything together with propolis.  What a difference a queen can make!  My last observation was about the sound – odd as it might seem, it was actually kind of relaxing hearing the low hum of the hive as I was checking things out.  For someone who was conditioned by society to fear that noise (cartoons of bees attacking Yogi Bear come to mind :-)) I thought it was kind of neat.

Woodenware

Langstroth HiveThe components that come together to create the beehive you have seen in earlier posts are sometimes referred to collectively as ‘woodenware’.  Together, they make the modern beehive, which is often called a ‘Langstroth’ hive after its inventor.  These hives have a number of benefits over their predecessor, the basket or skep hive, but the biggest is that it allows you to inspect your bees (and harvest honey!) without destroying the hard workers and their home.  Other benefits of the Langstroth hive are the interchangeability of parts and the ideal amount of ‘bee’ space inside (too much space and the bees will build burr comb, which makes a mess).  A breakdown of the major woodenware components are found in the picture on the left.  The following subsections will discuss what each of the components shown are used for.

Hive Stand & Bottom Board
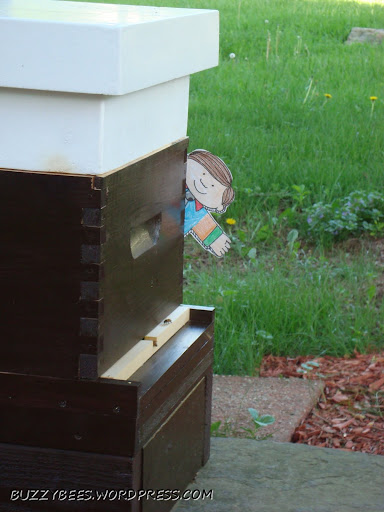
Flat Stan VistThe hive stand’s primary purpose is to elevate the hive up off the ground to keep intruders such as water, other insects, and animals from entering the hive.  The one pictured above is a bit more complicated that many stands – some use a level tree stump!  If you look at the picture at left from when Flat Stan visited, you can see that my hive is basically sitting on a rectangle made of 2x4s and a stone slab.

The next part up from the stand is the bottom board.  In the left-hand picture, the bottom board is seen underneath the unpainted board in front of the entrance to the hive.  The bottom board lifts up the hive body to create a space so the bees can enter and leave the hive.  Additionally, bottom boards such as mine are screened to allow for better ventilation and to catch mite which happen to fall from bees in the hive!

Hive Body, Supers, &  Frames

Bottom Brood ChamberThe brood chamber, (where the bees live, rear their young, and store their own honey) consists of 1 to two ‘deep’ hive bodies.  These usually come either 8 or 10 frame configurations, which is simply a measure of how many frames can be placed in the body.  The term ‘deep’ indicates that these are the tallest of the three sizes of frames.  As you can see in the picture on the left, the frames hang from a groove in the top of the hive body.  The picture also shows how the hive looks when you have the two hive bodies together to make the brood chamber.

When you are inspecting a hive, you typically remove one frame from the body you are inspecting to allow more space to work the other frames.  In this picture, I was busy checking the upper hive body (which is beginning to have the comb drawn out so the bees can use it to store supplies and brood) so I had my smoker handy and one frame pulled out.
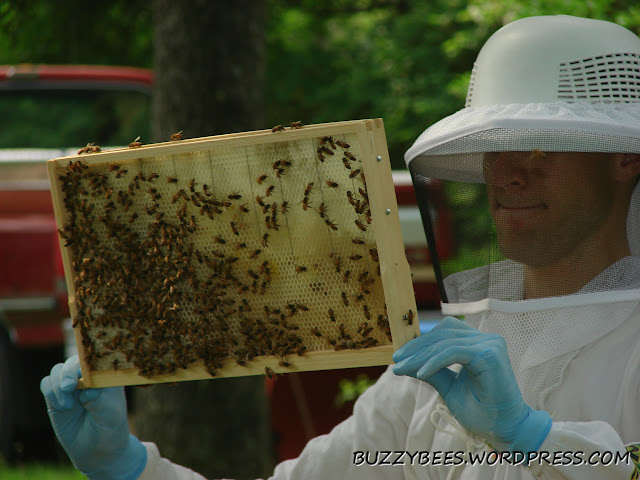
FrameFrame height varies with the hive bodies they go in.  For example a deep frame would be used in a deep body.  Otherwise, they are essentially similar in all the other dimensions (during re-queening I actually stacked my two supers to create a place to put frames in temporarily).

Speaking of supers, my hive hasn’t gotten far enough along to start putting more ‘storage’ space in the hive.  Stay tuned though, we might be able to get one or two honey supers on later in the season so we can get some honey! 🙂

Inner & Outer Cover

Inner CoverWhile the outer cover’s function is pretty obvious (i.e. it keeps stuff out :-D), the inner cover is often a bit more of a mystery.  As you can see on the left, the inner cover is essentially a sheet of wood with a hole in the center and a ridge around the perimeter on both sides (although this can vary between inner cover designs).  Appreciating that I originally thought that the inner cover was the ‘back door’ to the hive and helped with ventilation, I was confused at the purpose of a cover such as mine (which didn’t have a hole in one of the sides for the bees to leave the hive from).  After doing some research, it seems as though the inner cover’s major function is to create an air gap between the hive and the outer cover.  While that little pocket of air might not mean much for us during the summer time, it is actually a big help in maintaining the hive’s temperature during the chillier months!

Outer CoverMy outer cover is made of a polystyrene material, which makes it lightweight and – apparently – more durable than its counterparts.  You will see many outer covers that tout that they are ‘telescoping’.  If you are like me, you will think that they somehow expand.  However, this appears to be a marketing catch phrase to say that the outer cover is large enough to overhang the entrance to the hive.  That might not sound like a big deal, but it is to the bees when it rains!

Hope this primer is helpful in understanding some of the stuff you see floating around in my pictures and descriptions.  In future posts I hope to talk about some of the tools beekeepers use as well as the other parts of the woodenware that we’ll need as the colony expands!

Queen Acceptance Check – And A New Perspective

Last Saturday was a week since my last visit to the hive.  If you recall, I had to install a new queen since the original one went MIA.  Just as when the original queen was installed, we had to leave the ladies to themselves for about a week to allow the new queen to establish herself in the colony.

Burr CombSince the last couple of posts have shown how everything looks from a distance, I was able to catch a couple close-ups using my phone’s camera.  Hopefully these are helpful in showing you a new perspective to the things that go on inside the hive.

One of the first things I saw when I opened the lower brood chamber was the burr comb (you can see it in the gap between the frames in the picture at right).  What is burr comb you ask?  Beekeeping for Dummies defines burr comb as the extension of the comb beyond what built within the frames.  A lot of the motivation behind burr comb stems from the amount of spacing within the hive frames – which warrants a discussion later down the road.  For now, just take my word for it that you don’t want to give the ladies too much room to work.

Queen CageHaving the burr comb was not something that was unexpected.  In fact, when I installed the small queen cage (see picture at left), I had a feeling that we might get to see some burr comb during this inspection.  As an aside, you can also see the hole that the queen emerged from the queen cage in this picture as well.  When her cage was originally placed into the hive, this hole was plugged with candy.  This candy was eventually consumed by the workers until the queen was able to escape.  This works as a kind of natural timer to prevent the queen from being released too early (and being killed).

Burr Comb on FrameWith all the extra space afforded by the queen cage (which took the place of a frame that I had to temporarily remove for the week to make everything fit), my industrious ladies were busy at work filling the gaps with burr comb and honey!  At right you can see some of the burr comb on a frame after it was pulled out.  You might be wondering what you do with this extra comb.  The answer is basically to scrape it off the frame with your hive tool and have the girls start over again.  Since they started to store honey in some of this comb, it made quiet the mess in some spots!  At least we have a little more comb for the beeswax collection.  Perhaps by the end of the year we’ll have enough to make a few candles or something. 🙂

One of the tough parts was trying to get the comb off without crushing many of the bees, but that is a hazard with about any job that you do with the equipment since they are everywhere!  The one cool thing was getting a small taste of the honey from some of the comb – definitely a lot better than the stuff you get at the store!

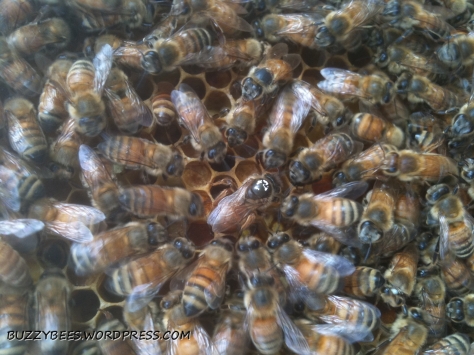
The other big task during the inspection was finding the queen, of course!  After having not see my original queen for some time, I was afraid that I would also strike out finding the new queen.  However, beekeeper tricks pay off when there actually is a queen out and about.  While there wasn’t a lot of larva about (and I still haven’t figured out the eggs) to follow her trail, three things were helpful in locating her:

  1. Since she is marked, look for the bee with the white spot
  2. Generally, the other bees keep out of her way as she works around the colony
  3. She will be surrounded by a circle of her attending worker bees

If you take a look online, you won’t find a lot of great pictures showing this last point.  However, when I saw my girls posing showing off their new queen I knew I had to take the photo. 😀

My Queen

Fanning BeesIn addition to checking out what the queen was up too, I also caught a couple of the girls doing something you might find curious.  As you can see at the right, a few of them were caught hiking their  hind-ends high and buzzing away.  Any idea what they could be up to?  They are actually fanning.  This is done to dry out the honey as well as to regulate the temperature in the hive.  As it gets warmer out, we can expect to see more of the bees put on cooling duty!

Requeening

As I originally planned in my last post, my new queen arrived last Friday afternoon.  After a few days of wonder and worry, I would be getting another look at my bees to see what had gone on since my last peek.  I also got to complete a task that one normally does only once annually or bi-annually – requeening.

Some may wonder what requeening is and what purpose it serves.  The purpose becomes obvious when you remember that the health and temperament of the entire colony centers around this single insect.  By replacing a queen that is weak or aggressive with one that healthy and mild (requeening), the entire colony will eventually change to reflect the new queen’s traits as the number of her offspring grow.  You can even change the breed of honeybee by simply using a different breed of queen – the bees don’t mind one way or another!

The principle behind requeening is a simple one – find and remove the original queen and then install the new queen in a way like when we installed the original queen.  In practice, I found that becoming the ‘queen terminator’ is akin to finding a needle in a haystack – although I certainly had inexperience and an unmarked queen (check out the photos below to see my new ‘marked’ queen – she has a small white spot of paint on her back to make identification easier) to content with.

To make sure that any queen that might be in the brood chambers wasn’t giving me the slip, all the frames from each box would be pulled and moved over to a spare box (I cheated and used my two honey super boxes for this purpose) so the inside of the brood boxes could also be checked.  This also gave me two chances to spot the queen…in addition to the two previous visits where she was also AWOL.

Searching through the frames, the results were similar to my past two inspections (described here and here).  The exception was that the amount of capped brood continued to decrease, meaning that no eggs or larva was developing into this stage.  I also found two opened supercedure cells, which are actually not as pronounced as I originally had thought.

In the queen hunting department, I scored a big ‘0’, although I potentially could have dealt with three different queens running about.  Considering the fact that there was no eggs/larva present, it doesn’t seem like my ladies have had a leader for some time now (it takes 9 days for a honeybee to advance from a egg to a capped brood, so I’m assuming that is the least amount of time she has been gone).

After putting the brood chamber back together, I got a bit of relief when I inserted the new queen cage.  When you install a new queen into an established colony, there is a possibility they may not initially accept her (she’s an intruder after all).  To defend the colony, the bees will ‘ball’ up on the intruder similar to the picture at right.  It’s somewhat savage, but the bees basically overpower the intruder and rip it to pieces.  In the instance of a attacking hornet, like in the picture, this is a good thing.  However, when the bees attempt to ball your new queen, you can tell that the old queen’s scent is still the one dominating the colony.  Luckily, my bees did not pay the new queen any attention that was out of the ordinary.  🙂

Now the waiting game begins again.  As before, I have to wait another week before I can take a peek to see if the new queen has been accepted and released.  Hopefully I’ll have better luck with this queen than the last.  Either way, it continues to be quite the education – check back again to see how it turns out!  😀

Looks Like I Got A Dud…

As I mentioned in my last post, on my last visit to the hive I found two things that bothered me:  1)  I wasn’t able to find any eggs or larva and 2) I found a swarm cell in one of my frames.  With these two issues floating in my head, I did an impromptu inspection of the hive when I got home from work yesterday.  While it’s usually not a good idea to pay a visit to the colony so late in the day (10 – 5 is the generally accepted times), since the field bees are usually out and about, both issues warranted a quick look to see if either could be resolved.

To take care of the potential swarming issue, I added the upper brood chamber – this is essentially a duplicate of the box and frames seen in my other photos.  While I was at it, I also removed the feeder since they were no longer taking syrup and it looked like it needed cleaned (there was some sort of algae beginning to grow).

The hunt for eggs & larva was a different story. I reinspected each frame, looking to see if I had missed any eggs/larva orsee if I could catch queen wandering around.  This was also an opportunity to gauge how my capped brood was doing (i.e. was it increasing or decreasing) and to see if any supercedure or swarm cells developed.  What I found was essentially the same as before – lots of honey and pollen, as well as a decreasing supply of capped brood and a number of empty brood cells.  Uh Oh!

Today I gave Draper Super Bees, who supplied my original package of bees, a call to get a sanity check and some free advice.  What I found from the gentleman (who was extremely helpful, by the way) was that my queen was mated naturally and may not have been mated completely.  If you remember from one of my first posts, when a queen mates, she does so only once during her virgin flight.  During this flight, she mates with a number of drones, which should allow her to lay fertilized eggs for the rest of her life.  So in other words, after a good week or so of work my queen as turned out to be somewhat of a dud.

Now you might be wondering what the fix to something like this is.  🙂  Well, I’ll just save that for one of my upcoming posts.  Here is a hint though, the new queen will be in town Friday, and she’ll hopefully set this hive straight!  😀